There’s just something about the warm, chewy texture of peanut butter paired with the smooth chocolate of a kiss that feels like a cozy hug for your taste buds. This Peanut Butter Kiss Cookies Recipe is a timeless classic for a reason — it’s deliciously simple and utterly satisfying.

Jump to:
Why You'll Love This Recipe
Whenever I bake these cookies, I’m instantly taken back to childhood memories of holiday baking with my family. It’s one of those recipes that’s foolproof, tastes incredible, and brings out a little nostalgic joy. I know you’ll appreciate how easy it is to whip up a batch and the way these cookies balance peanut butter and chocolate perfectly.
- Simple Ingredients: You probably already have everything in your pantry, making these cookies perfect for last-minute baking.
- Perfect Texture: Soft and chewy cookie base meets the slight snap of the chocolate Kiss on top.
- Family Friendly: Kids love helping roll the dough in sugar and place the Kisses on top — baking becomes a fun activity, not a chore.
- Versatile Sweetness: They’re not overly sweet, so they satisfy that dessert craving without feeling heavy or too sugary.
Ingredients & Why They Work
Each ingredient plays a role in creating that classic cookie you expect from a Peanut Butter Kiss Cookies Recipe. From the creamy peanut butter bringing moisture and flavor to the brown sugar adding depth and softness — these ingredients harmonize so well. Let’s break it down:
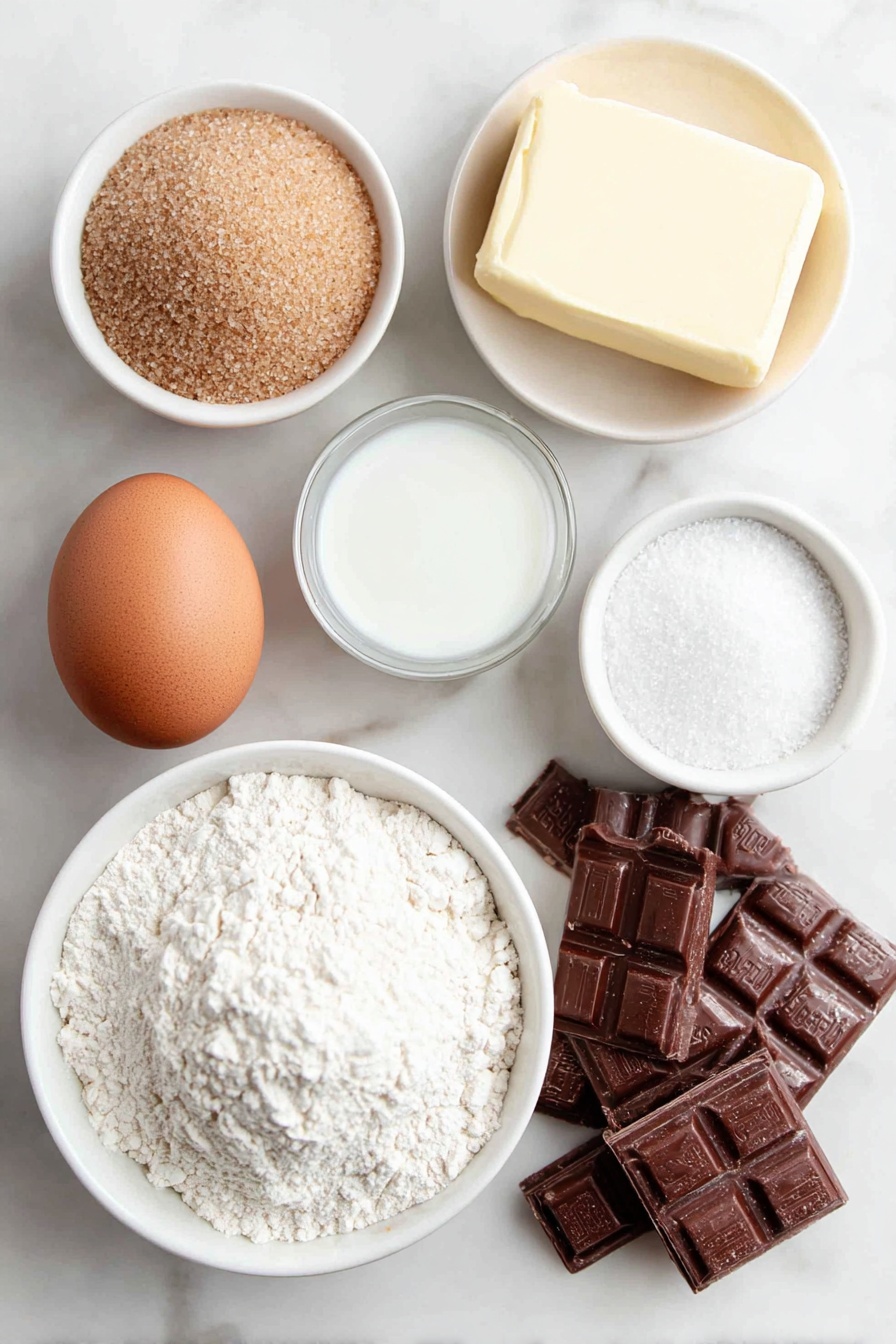
- Unsalted Butter: Helps control the saltiness and creates a creamy texture for the dough.
- Creamy Peanut Butter: The star of the show—choose a good quality one for the richest flavor and smoothest texture.
- Light Brown Sugar: Adds moisture and a slight caramel note, giving that soft chewiness in the cookie.
- Granulated Sugar: Mixed in and used for rolling, it gives the cookies a delightful crunch on the outside.
- Vanilla Extract: Enhances the overall flavor with a warm, sweet aroma.
- Egg: Binds ingredients and adds structure.
- Milk: Just a touch to keep the dough soft and easy to work with.
- Baking Soda: Gives the cookies a gentle rise and light texture.
- Salt: Balances sweetness and intensifies the peanut butter flavor.
- All-Purpose Flour: The base of the cookie dough, providing structure without making cookies dry or tough.
- Hershey’s Kisses: The iconic chocolate topping that melts slightly and adds sweetness with every bite.
Make It Your Way
I love how this Peanut Butter Kiss Cookies Recipe invites creativity. Sometimes I swap in chunky peanut butter for an extra nutty texture or toss in a sprinkle of sea salt right before baking for a little flavor punch. You can easily make these gluten-free by swapping the flour for your favorite blend, too.
- Variation: Adding a handful of mini chocolate chips inside the dough turned out to be my kids’ favorite upgrade for extra chocolate love.
- Dietary tweaks: Try using natural peanut butter and a sugar substitute to make them a bit healthier without sacrificing the classic taste.
- Seasonal change: For holiday fun, swap Kisses with peppermint-flavored ones or sprinkle crushed candy canes on top for a festive treat.
Step-by-Step: How I Make Peanut Butter Kiss Cookies Recipe
Step 1: Cream the Butters and Sugars till Silky Smooth
I start by softening the unsalted butter and creamy peanut butter until they blend effortlessly. Using either a hand mixer or a stand mixer, cream them together, then add the brown and granulated sugars. The key here is to mix until completely smooth — you want that silky texture to make the cookies ultra tender.
Step 2: Mix in the Wet Ingredients
Once your buttery peanut butter mixture is perfectly creamy, add the egg, vanilla extract, and milk. Mix these until just combined. Don’t overdo it — a few extra seconds are okay, but you want to avoid a thin batter.
Step 3: Incorporate the Dry Ingredients
Next, stir in the baking soda and salt into your wet batter. Slowly add the all-purpose flour, mixing just until the dough comes together and looks smooth. I like to scrape down the bowl sides to ensure everything’s nicely blended. This helps avoid pockets of dry flour or uneven baking.
Step 4: Roll, Coat, and Bake
Scoop tablespoon-sized dough balls and roll them in a small bowl of granulated sugar — this step adds that delightful outer crunch that contrasts with the soft inside. Place the sugared dough balls about 2 inches apart on parchment-lined cookie sheets. While these bake at 350°F for about 9-13 minutes, get those Hershey’s Kisses unwrapped and ready.
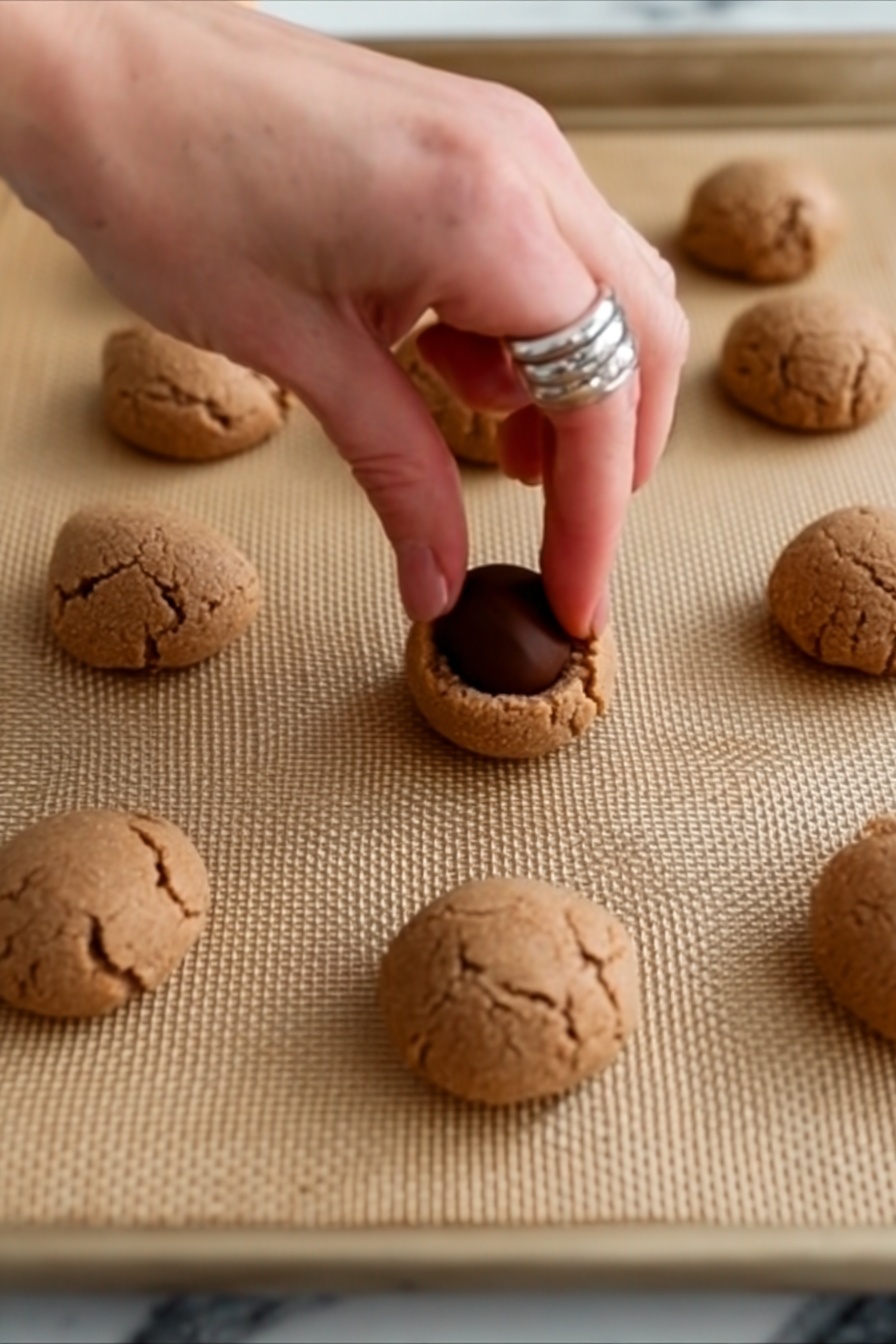
Step 5: Add the Iconic Kiss
Right after you take the cookies out of the oven, gently press a Hershey’s Kiss onto the center of each one. The warmth from the cookie helps the chocolate soften without melting completely — that’s the ideal texture you want. Let them cool fully on the baking sheet before moving, so the Kiss sets perfectly on top.
Top Tip
Through my many batches of this Peanut Butter Kiss Cookies Recipe, I’ve learned a few little tricks that help every time — here’s what makes the biggest difference:
- Perfect Dough Consistency: Don’t overmix once you add the flour — mixing just until combined keeps your cookies tender instead of tough.
- Rolling in Sugar: Roll every dough ball in granulated sugar evenly; it helps create that slightly crisp shell which makes the cookie extra delightful.
- Timing the Chocolate Kiss: Press the chocolate Kiss in immediately after baking, while cookies are hot but not burning, so it melts just right without losing shape.
- Use Parchment or Silicone Mats: Prevent sticking and uneven cooking by lining your baking sheets properly — makes cleanup a breeze too.
How to Serve Peanut Butter Kiss Cookies Recipe

Garnishes
I usually stick with the classic look — just the chocolate Kiss on top — but if I want to jazz them up for a party, I sometimes sprinkle a pinch of flaky sea salt or finely chopped roasted peanuts on top while the chocolate is still soft. It adds a crunchy, salty contrast that’s amazing.
Side Dishes
These cookies go incredibly well with a tall glass of cold milk or a warm cup of coffee. For holiday occasions, I like serving them alongside fresh fruit or a cheese platter to balance out the sweetness.
Creative Ways to Present
For birthdays or cookie swaps, I arrange the cookies on a festive platter layered with doilies and edible flowers. Wrapping a mini stack with a colorful ribbon makes a charming gift. And if you have a themed party, use different colored Kisses or add edible glitter for sparkle.
Make Ahead and Storage
Storing Leftovers
I like to keep any leftovers in an airtight container at room temperature. The cookies stay soft and fresh for up to 4 days. If you live somewhere humid, storing them with a slice of bread can help keep moisture balanced and prevent drying out.
Freezing
These cookies freeze beautifully! I usually freeze the dough balls individually on a tray, then transfer them to a zip-top bag. When you’re ready to bake, just add a couple extra minutes to the baking time (skip rolling in sugar again), and you’ll have fresh cookies straight from the freezer.
Reheating
To warm up leftover cookies, I pop a couple in the microwave for about 10 seconds. This refreshes the softness and slightly melts the chocolate kiss, bringing them back to freshly baked joy.
Frequently Asked Questions:
Absolutely! Using crunchy peanut butter adds texture and a nutty crunch inside the cookie, which some people love. Just keep in mind the dough might be a bit chunkier, but the baking process stays the same.
No worries if you don’t have Hershey’s Kisses on hand — you can substitute with other bite-sized chocolates like mini peanut butter cups, or even chocolate chips pressed into the center right after baking.
The key is to place the chocolate Kisses on the cookies immediately when they come out of the oven — the residual heat softens them just enough without melting them completely. Also, let the cookies cool on the baking sheet before moving them to keep the shape intact.
Yes! Use a gluten-free 1:1 all-purpose flour blend as a substitute in this recipe and follow the instructions the same way. The texture might be slightly different but still delicious.
Final Thoughts
This Peanut Butter Kiss Cookies Recipe feels like a little piece of joy you can bake whenever you want to add a touch of sweetness to your day. It’s quick, rewarding, and never fails to bring smiles around the kitchen. I’m excited for you to try it out and make it your own — trust me, these cookies will become a beloved staple in your baking repertoire!
Print
Peanut Butter Kiss Cookies Recipe
- Prep Time: 20 minutes
- Cook Time: 13 minutes
- Total Time: 33 minutes
- Yield: 40 cookies
- Category: Dessert
- Method: Baking
- Cuisine: American
Description
This Easy Peanut Butter Blossoms recipe features soft and chewy peanut butter cookies topped with classic Hershey's Kisses. Perfect for any occasion, these nostalgic treats combine creamy peanut butter with a sweet chocolate center for a delightful bite.
Ingredients
Cookie Dough
- ½ cup unsalted butter, softened (113 g)
- ¾ cup creamy peanut butter (213 g)
- ¾ cup light brown sugar, packed (138 g)
- ¼ cup granulated sugar (50 g), plus more for rolling (about ½ cup)
- 1 teaspoon vanilla extract (5 ml)
- 1 large egg
- 1 tablespoon milk (15 ml)
- ½ teaspoon baking soda
- ¼ teaspoon salt
- 1 ¾ cup all-purpose flour (248 g)
- 40 Hershey's Kisses (or a few more)
Instructions
- Preheat Oven and Prepare Sheets: Preheat your oven to 350°F (177°C). Line two cookie sheets with silicone baking mats or parchment paper to prevent sticking.
- Cream Butter and Sugars: In a large bowl, combine the softened butter and creamy peanut butter. Using a hand or stand mixer, mix until fully combined. Add light brown sugar and granulated sugar, and cream until the mixture is smooth and fluffy.
- Add Wet Ingredients: Mix in the egg, vanilla extract, and milk on medium speed until all ingredients are well incorporated.
- Incorporate Dry Ingredients: Add baking soda and salt to the mixture and stir. Slowly add the all-purpose flour and mix just until the dough comes together smoothly. Scrape down the sides of the bowl to ensure even mixing.
- Shape and Sugar Roll: Pour about ½ cup granulated sugar into a separate bowl. Scoop 1 tablespoon-sized balls of dough, roll each ball in the granulated sugar, and place them 2 inches apart on the prepared cookie sheets.
- Bake Cookies: Bake in the preheated oven for 13 minutes or until the edges are just golden brown and the tops are no longer glossy.
- Add Hershey's Kisses: Immediately after removing the cookies from the oven, gently press one Hershey's Kiss into the center of each cookie while still warm.
- Cool and Serve: Allow the cookies to cool on the baking sheets before transferring them to a wire rack or serving plate.
Notes
- Rolling the dough balls in sugar before baking gives the cookies a nice crackly texture and prevents sticking.
- Press the Hershey's Kiss into the cookie immediately after baking to ensure it adheres and doesn't crack.
- You can substitute creamy peanut butter with natural peanut butter, but the texture may be slightly different.
- For a festive twist, try using different flavored chocolate kisses or adding chopped peanuts to the dough.
- These cookies can be stored in an airtight container at room temperature for up to 5 days.
Nutrition
- Serving Size: 1 cookie
- Calories: 152 kcal
- Sugar: 9 g
- Sodium: 122 mg
- Fat: 8 g
- Saturated Fat: 3 g
- Unsaturated Fat: 5 g
- Trans Fat: 0 g
- Carbohydrates: 17 g
- Fiber: 1 g
- Protein: 3 g
- Cholesterol: 17 mg


Leave a Reply