There’s something utterly charming about a cookie that looks almost too cute to eat, yet tastes rich and comforting. This Chocolate Mushroom Sugar Cookies Recipe brings together a delightful chocolatey outside with a whimsical mushroom design that’s perfect for cozy afternoons or festive gatherings.

Jump to:
Why You'll Love This Recipe
These cookies have a special place in my heart because they’re not just tasty—they’re a visual treat, too. The idea of a slice-and-bake cookie that delivers soft, thick bites and a fun mushroom surprise inside? It’s just too delightful not to share!
- Slice-and-bake convenience: You can make the dough ahead, freeze it, and bake fresh cookies whenever the craving hits.
- Adorable design: The mushroom motif in the center is surprisingly simple to create but looks impressively cute.
- Chocolate + sugar cookie combo: The cocoa powder adds a rich chocolate flavor to the outer layer, balancing the sweetness perfectly.
- Versatile for occasions: Whether it’s a cozy winter day or a festive table centerpiece, these cookies fit so many vibes effortlessly.
Ingredients & Why They Work
Each ingredient in this Chocolate Mushroom Sugar Cookies Recipe plays a key role in building that soft, thick texture and vibrant look. I'll share some shopping and prep tips to help you choose the best ingredients and set yourself up for success.

- Butter: Use butter that’s just barely softened—too melted and the dough gets too soft to shape well.
- Granulated sugar: Provides that classic sweetness without overpowering the cocoa flavor.
- Salt: Just a pinch to balance the sweetness and deepen flavors.
- Vanilla extract: Adds warmth and complexity, don’t skip it.
- Egg: Room temperature eggs mix more evenly, giving a tender crumb.
- All-purpose flour: The backbone of the cookie — measure carefully for consistent texture.
- Dutch-process cocoa powder: This gives a rich chocolate flavor and darker color without bitterness.
- Red gel food coloring: Helps create the classic bright red mushroom caps without thinning the dough.
- White round pearl sprinkles: These mimic the characteristic white spots on mushroom caps.
- Coarse sugar: Adds a sparkling crunchy texture to the cookie top.
- Powdered sugar & heavy cream: For a smooth, creamy white “stem” icing that’s easy to pipe.
- Green gel food coloring: Optional, but perfect if you want to pipe tiny decorative grass or details.
Make It Your Way
I like to experiment by adding a touch of cinnamon to the cocoa dough for a subtle warm twist, but you can easily make this your own by tweaking colors or sprinkling on different decorative sugars.
- Variation: One of my favorite tweaks was swapping out the red coloring for pastel shades to match different holiday themes, like soft pinks for spring or deep greens for Christmas.
- Diet-friendly option: Try a butter substitute and gluten-free flour blend if you're catering to dietary needs; just keep an eye on dough consistency.
- Seasonal twist: Adding a pinch of nutmeg or orange zest can add a festive note without overpowering the chocolate.
Step-by-Step: How I Make Chocolate Mushroom Sugar Cookies Recipe

Step 1: Cream the Butter and Sugar to Perfection
Start by creaming the butter—make sure it’s just barely softened so it’s still cool to the touch but easy to beat. Mix in granulated sugar and salt until the texture is light and fluffy, about 3-4 minutes. This step is crucial for those soft, thick cookies — don’t rush it.
Step 2: Add Egg and Vanilla Gently
Beat in the room temperature egg and vanilla extract until everything is silky smooth. Using a room temperature egg helps avoid seizing the butter from the cold, ensuring smooth dough that’s easy to work with.
Step 3: Combine the Dry Ingredients Carefully
Whisk together the flour and Dutch process cocoa powder, then gradually add to the wet mixture. Mix on low speed until you have a soft dough that holds together but isn’t sticky. This makes shaping those mushroom shapes a breeze.
Step 4: Shape, Color & Chill the Dough
Separate a portion of the dough to tint bright red with gel food coloring — this will become the mushroom caps. The rest remains chocolate brown. I like to chill both doughs for about 45 minutes to firm up; it helps the shapes hold while slicing and baking.
Step 5: Assemble Your Mushrooms and Prep for Baking
Form small “caps” from the red dough and add white pearl sprinkles for those perfect mushroom dots. Use the plain dough to create the stem sections, dabbing a little of the cream cheese icing (powdered sugar + cream + a touch of green gel if you want a grassy look) for extra charm. Slice into rounds about ½ inch thick.
Step 6: Bake & Enjoy Fresh
Bake your slices at 350°F (175°C) for 8-10 minutes. They’ll puff up to a deliciously soft and thick texture—watch them carefully so the edges don’t brown too much. Let cool on a wire rack before digging in!
Top Tip
I’ve learned the best results come from chilling the dough twice: first after mixing and again after shaping the mushrooms but before slicing and baking. This keeps the design crisp and the dough firm, so you get those perfect shapes every time.
- Don't Over-Softened Butter: If your butter is too soft, the dough spreads too much and loses those cute mushroom shapes.
- Room Temperature Eggs: They mix in smoother and prevent a curdled batter.
- Use Gel Food Coloring: It won’t alter your dough consistency like liquid dyes do.
- Freeze Dough for Later: Freeze your shaped dough log wrapped tightly — slice and bake fresh cookies on demand!
How to Serve Chocolate Mushroom Sugar Cookies Recipe

Garnishes
I love to finish these cookies with a sprinkle of coarse sugar before baking for extra sparkle. For a bit of whimsy, piping tiny green “grass” around mushrooms with colored cream cheese icing adds a lovely pop of color and fun detail.
Side Dishes
These are perfect alongside a hot cup of tea or coffee, especially chai or a lightly sweetened latte. They also pair wonderfully with a dollop of whipped cream or a bowl of fresh berries for an extra special treat.
Creative Ways to Present
For parties, arranging these cookies on mossy green serving trays or wooden platters really amps up the cottagecore vibe. I once tucked them among cinnamon sticks and pinecones for a holiday table centerpiece that guests couldn’t stop admiring (or eating).
Make Ahead and Storage
Storing Leftovers
Store any leftover cookies in an airtight container at room temperature for up to 4 days. I find placing a slice of bread inside helps keep them soft and chewy—a little kitchen trick I swear by.
Freezing
The dough itself freezes beautifully, wrapped tightly in plastic wrap and foil. When you’re ready for fresh cookies, just thaw the log slightly and slice into rounds — bake straight from there. This frozen-to-fresh method is a total game changer.
Reheating
If you want your cookies warm, pop them in a 300°F oven for about 5 minutes to refresh that just-baked softness without drying them out. Microwaving sometimes makes sugar cookies a bit chewy, so I avoid that whenever possible.
Frequently Asked Questions:
Natural cocoa powder has a brighter, more acidic profile than Dutch-processed cocoa, which is smoother and darker. For this recipe’s flavor and color, Dutch-process cocoa is preferred, but natural cocoa can be used—it may slightly alter taste and color.
Chilling the dough twice is key: once after mixing, and again after shaping the mushroom designs but before slicing and baking. Also, make sure your dough isn’t too soft and handle slices gently onto your baking sheet.
You can try substituting the butter with vegan margarine and using a flax or chia egg instead of chicken egg. Keep in mind, the texture may vary, so test a small batch first to see how the dough holds together.
Most likely your butter was too soft or melted when mixing, causing the dough to spread during baking. For best results, use butter that’s just barely softened and chill the dough before baking.
Final Thoughts
Making these Chocolate Mushroom Sugar Cookies Recipe feels like crafting little edible works of art, and I love how they bring a smile every time. Whether you’re baking for a crowd or keeping them just for yourself, these cookies deliver on both looks and flavor. I really hope you enjoy making and sharing them as much as I do—trust me, they’re a keeper!
Print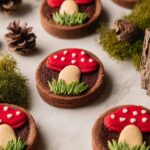
Chocolate Mushroom Sugar Cookies Recipe
- Prep Time: 20 minutes
- Cook Time: 10 minutes
- Total Time: 90 minutes
- Yield: 18 cookies
- Category: Dessert
- Method: Baking
- Cuisine: American
- Diet: Vegetarian
Description
These Mushroom Sugar Cookies are thick, soft slice-and-bake cookies featuring a rich chocolate outside and a charming mushroom design in the center. Convenient and easy to make, they are perfect for holiday treats or a cozy cottagecore vibe. Bake fresh cookies by slicing dough as needed or prepare a batch to freeze for later enjoyment.
Ingredients
Cookie Dough
- ¾ cup butter (barely softened - not too soft!)
- ¾ cup granulated sugar
- ¼ teaspoon salt
- 1 teaspoon vanilla
- 1 large egg (room temperature)
- 2 cups all purpose flour (240g)
- 2 tablespoons cocoa powder (dutch processed)
Decorations
- Red gel food coloring (as needed)
- White round pearl sprinkles
- ⅓ cup coarse sugar
- ½ cup powdered sugar
- 1-2 tablespoons heavy whipping cream
- Green gel food coloring (as needed)
Instructions
- Prepare the Dough: In a mixing bowl, cream the butter and granulated sugar together until light and fluffy. Add the salt, vanilla, and egg, and mix until well combined.
- Add Dry Ingredients: Sift together the all-purpose flour and cocoa powder, then gradually incorporate into the wet mixture until a dough forms.
- Shape and Color the Mushrooms: Divide a small portion of dough and tint portions with the red and green gel food coloring as desired to create mushroom caps and stems.
- Assemble the Design: Roll out portions of plain dough and colored dough, layering and shaping to form the distinct mushroom motif with red caps, white spots (use pearl sprinkles), and green stems.
- Coat and Chill: Roll the assembled dough log in coarse sugar to coat, then wrap tightly in plastic wrap. Chill the dough in the refrigerator for at least 1 hour or until firm.
- Slice and Bake: Preheat the oven to 350°F (175°C). Slice the chilled dough into approximately ¼-inch thick cookies and place on a lined baking sheet.
- Bake: Bake for 10 minutes or until the edges are just beginning to brown.
- Prepare Icing (Optional): Mix powdered sugar with 1-2 tablespoons heavy whipping cream and tint with green gel food coloring to create a subtle decorative icing for stems if desired.
- Cool and Decorate: Remove cookies from the oven, cool on a wire rack, and decorate with icing as preferred.
Notes
- These cookies are slice-and-bake, so you can freeze the dough and bake fresh cookies whenever you like.
- Use Dutch-processed cocoa powder for a richer chocolate flavor and darker cookie dough.
- Be careful not to over-soften the butter; dough texture is key for shaping.
- Adjust gel food coloring amounts gradually to achieve desired vibrant colors without affecting dough consistency.
- White pearl sprinkles are perfect for mushroom spots; avoid using too many to maintain balance in design.
- The cookie dough benefits from chilling to make slicing easier and to keep the shapes intact during baking.
Nutrition
- Serving Size: 1 cookie
- Calories: 186 kcal
- Sugar: 15 g
- Sodium: 97 mg
- Fat: 8 g
- Saturated Fat: 5 g
- Unsaturated Fat: 2.4 g
- Trans Fat: 0.3 g
- Carbohydrates: 26 g
- Fiber: 1 g
- Protein: 2 g
- Cholesterol: 30 mg


Leave a Reply