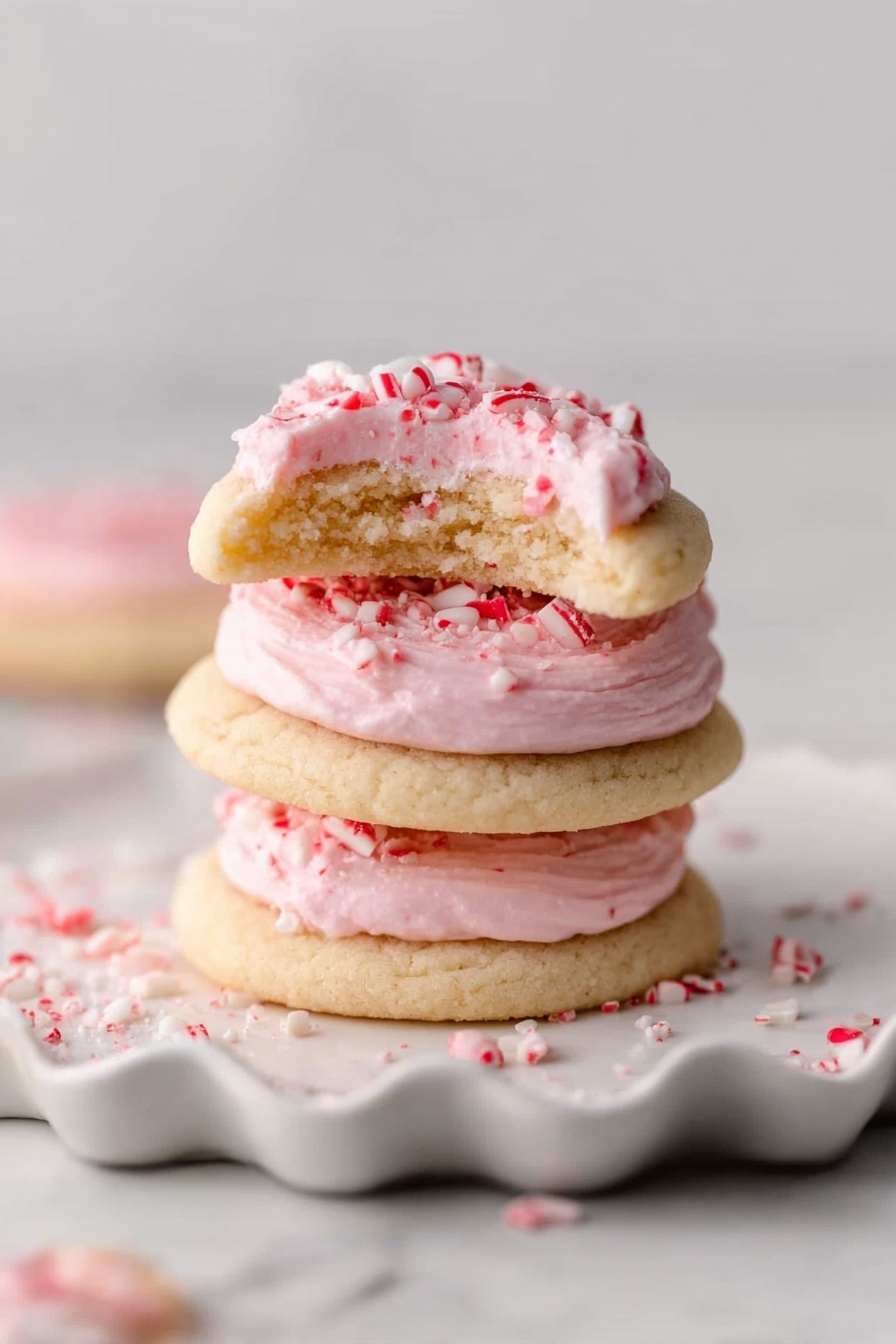
There’s something magical about a cookie that just melts on your tongue, and the Peppermint Meltaway Cookies Recipe does exactly that. With their delicate crumb, buttery flavor, and a refreshing hint of peppermint, these cookies have become my go-to treat for cozy afternoons and holiday gatherings.

Jump to:
Why You'll Love This Recipe
I have to tell you, this isn’t just any peppermint cookie. The texture is that perfect "melt in your mouth" kind of softness that you’ll find addicting. Each bite feels like a little cloud of buttery peppermint goodness, which is perfect if you want cookies that stand out but are easy to make.
- Unique Texture: The use of cornstarch and confectioners’ sugar gives these cookies a tender, meltaway crumb you won’t get from regular sugar cookies.
- Refreshing Peppermint Flavor: Real peppermint extract shines through without overpowering the buttery base.
- Easy Buttercream Frosting: The smooth peppermint buttercream frosting is simple to whip up and complements the cookies perfectly.
- Perfect for Gift-Giving: These pretty cookies sprinkled with crushed candy canes are festive and homemade gift-worthy for the holidays.
Ingredients & Why They Work
Every ingredient in the Peppermint Meltaway Cookies Recipe works in harmony to create that tender texture and subtle peppermint breeze. Knowing a bit about why helps you pick your ingredients wisely and swap things out if needed.
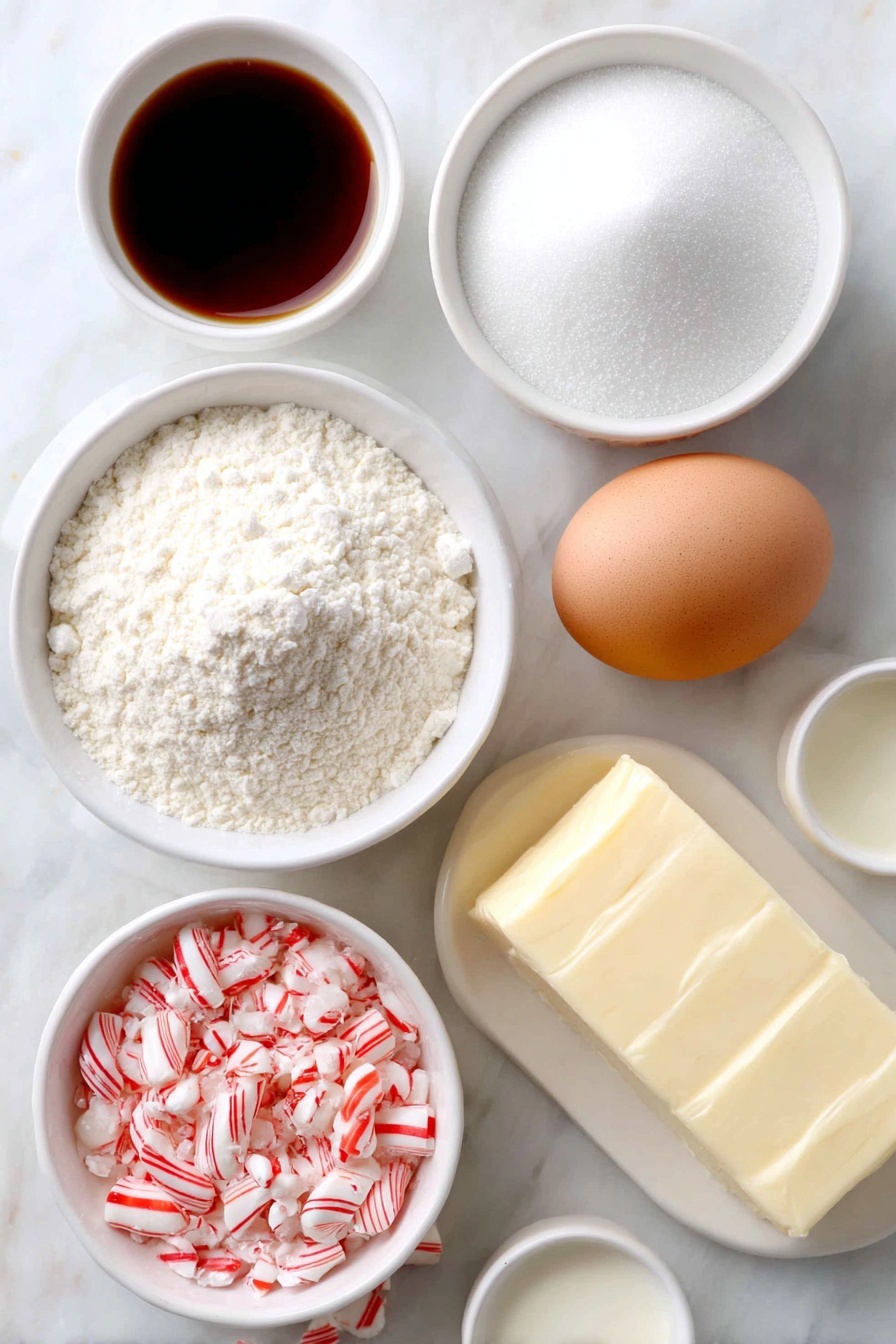
- Unsalted Butter: Using unsalted is key so you can control the salt level and get that pure, creamy flavor. Make sure it’s softened for easy creaming.
- Confectioners' Sugar: This powdery sugar keeps the cookies soft and tender, unlike granulated sugar which would make them crisper.
- Egg Yolk: Adds richness and helps with structure, but the dough stays tender because there’s no egg white here.
- Pure Vanilla Extract: Balances the peppermint and adds warmth to the flavor.
- Peppermint Extract: The star of the show, so choose a good-quality extract with a clean, fresh flavor for best results.
- All-Purpose Flour: Provides structure while keeping the cookies soft when combined with cornstarch.
- Cornstarch: This is what really gives these cookies that meltaway texture – it tenderizes the dough beautifully.
- Baking Powder: Just a touch to help these cookies rise slightly and stay light.
- Salt: Enhances all the sweet flavors.
- Milk (for frosting): Adjusts the buttercream’s consistency - I usually use a splash of whole milk, but any milk or milk alternative works well.
- Crushed Candy Canes: Adds festive crunch and a burst of peppermint sparkle on top.
Make It Your Way
I love how this recipe invites you to make it your own. Whether you want to dial up the peppermint, tone it down, or even swap out flavors, it’s so forgiving. I sometimes add a pinch of cinnamon or nutmeg around the holidays for a warm twist.
- Variation: For a more subtle mint flavor, reduce the peppermint extract to ¼ teaspoon and add extra vanilla. It’s cozy and less minty, but still delicious.
- Dairy-Free Option: I’ve swapped the butter with vegan margarine and used almond milk in the frosting with great results—cookies still melt away beautifully!
- Color Fun: A drop of red or pink food coloring in the frosting makes these cookies even more festive and fun for holiday parties.
Step-by-Step: How I Make Peppermint Meltaway Cookies Recipe
Step 1: Cream the Butter and Sugar Until Fluffy
Start by beating your softened butter on medium speed until it’s creamy—this usually takes about a minute. Then add the confectioners’ sugar, starting on low so it doesn’t puff up everywhere, and then crank it to medium-high for a good 2 minutes. That light, fluffy texture is the secret to tender cookies. Don’t forget to scrape the bowl sides so everything mixes evenly.
Step 2: Add Your Flavor and Egg Yolk
Mix in the egg yolk along with the vanilla and peppermint extracts. Beat on high just until everything is combined – you want that peppermint essence to get evenly distributed without overmixing the dough.
Step 3: Combine Dry Ingredients and Mix Gently
Whisk together the flour, cornstarch, baking powder, and salt, then add them gradually to your butter mixture on low speed. The dough will be thick and creamy, and that’s exactly what you want! Remember, no overmixing—just enough to bring the dough together.
Step 4: Chill the Dough
Here’s a non-negotiable part: chilling. Pop the dough in the fridge for at least 30 minutes (or up to 3 days if you’re prepping ahead). It helps the flavors meld and makes the dough easier to handle so your cookies don’t spread too much while baking.
Step 5: Shape the Cookies and Bake
Scoop about a tablespoon of dough, roll it into balls, and space them well on your lined baking sheets. I like flattening them just slightly with my palm so they spread into perfect meltaway rounds—around 2 inches in diameter. Bake at 350°F for 13–14 minutes. Because these cookies don’t brown much, keep an eye out for the edges to look set.
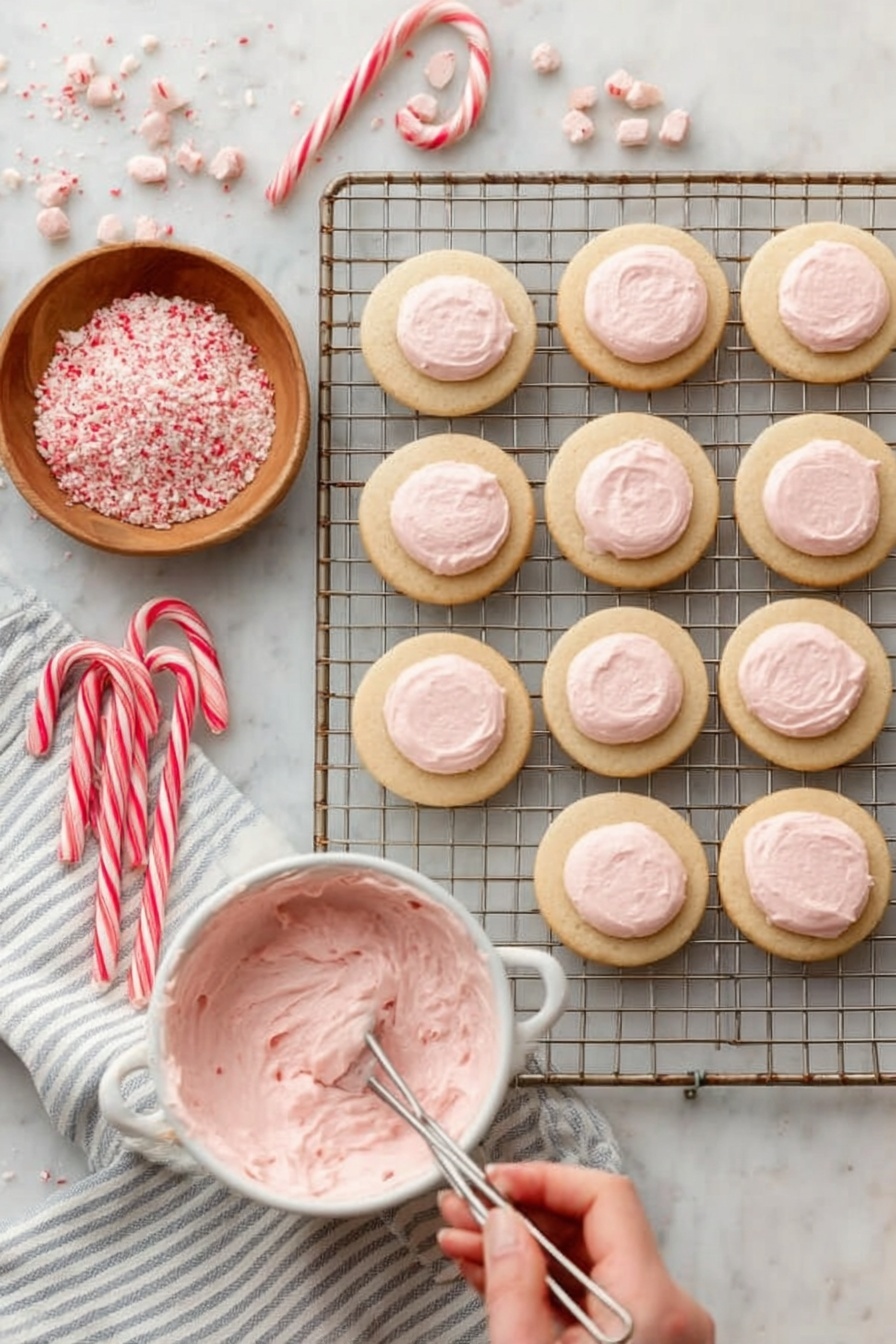
Step 6: Cool, Then Frost
Let the cookies cool on the baking sheet for about 10 minutes before transferring them to a rack to cool completely. Meanwhile, whip up the peppermint buttercream by beating softened butter with confectioners’ sugar, milk, vanilla, and peppermint extracts. Adjust thickness with more sugar or milk as needed, then spread it generously onto each cookie.
Step 7: Add Crushed Candy Canes
Finally, sprinkle crushed candy canes over the frosting while it’s still fresh. Not only does this add a delightful crunch, but it also gives your cookies that festive, holiday sparkle that everyone loves.
Top Tip
Over the years, I’ve learned that the key to these cookies’ perfect texture is the chilling step and the gentle flattening of dough balls. Skipping or rushing these parts really changes how they bake, so here are some tips from my kitchen to yours.
- Don’t Skip Chilling: The dough firms up and the butter re-solidifies, preventing excessive spread during baking.
- Handle Dough Gently: Overmixing after adding flour can make the cookies tough, so mix only until just combined.
- Flatten Dough Balls Slightly: This promotes even baking and achieves that signature meltaway shape and texture.
- Watch Your Bake Time: Because they won’t brown, check for set edges rather than color to avoid drying them out.
How to Serve Peppermint Meltaway Cookies Recipe
Garnishes
I love finishing these cookies with a sprinkle of crushed candy canes because it adds a pop of color and that extra peppermint crunch. Sometimes I’ll dust a little extra confectioners’ sugar on top for a snow-kissed look—it’s perfect for winter gatherings.
Side Dishes
These cookies pair wonderfully with a warm cup of hot chocolate or peppermint tea. For holiday parties, I like setting them alongside a cheese platter or fruit — the balance of sweet and savory is delightful.
Creative Ways to Present
For special occasions, I arrange these meltaways in little gift boxes layered with parchment paper and tied with a festive ribbon. They also look adorable stacked on a tiered cookie stand surrounded by pine sprigs and ornaments.
Make Ahead and Storage
Storing Leftovers
Once frosted, I store these cookies in an airtight container at room temperature if I’m serving within a day. For longer storage, the fridge is best to keep the buttercream fresh — just bring them back to room temp before serving for the soft melt-in-your-mouth experience.
Freezing
I often freeze the unfrosted cookies in a sealed bag or container for up to 3 months. When ready, I thaw them fully and frost just before serving. Freezing keeps their texture intact surprisingly well.
Reheating
To revive frozen or refrigerated cookies, I let them come to room temperature naturally. If you want them a bit warmer, a few seconds in the microwave (10–15 seconds) works, but watch closely to avoid melting the frosting.
Frequently Asked Questions:
Peppermint oil is much more concentrated than peppermint extract, so if you decide to use oil, use it sparingly—start with just a drop and adjust to taste. Too much oil can be overpowering and even bitter, so proceed carefully.
Chilling the dough is crucial because it firms up the butter, preventing the cookies from spreading too much while baking. It also helps the flavors meld together and makes the dough easier to handle and shape.
You can substitute the all-purpose flour with a gluten-free flour blend designed for baking. Just make sure it contains xanthan gum or another binder to help maintain the texture. However, the final result may be slightly different in texture.
Start by adding the milk gradually to the butter and sugar blend while beating. If the frosting is too thick, add a bit more milk a teaspoon at a time. If it’s too thin, beat in more confectioners’ sugar until it thickens. Taste and adjust peppermint and vanilla extracts as needed.
Final Thoughts
These Peppermint Meltaway Cookies Recipe have a special place in my kitchen, especially around the holidays when friends and family gather close. They’re simple enough to whip up after a long day yet impressive enough to make anyone smile with every melt-in-your-mouth bite. I hope you enjoy making and sharing these cookies as much as I do — they really do taste like a little peppermint hug in cookie form.
Print
Peppermint Meltaway Cookies Recipe
- Prep Time: 1 hour
- Cook Time: 14 minutes
- Total Time: 1 hour 30 minutes
- Yield: 30 cookies
- Category: Dessert
- Method: Baking
- Cuisine: American
- Diet: Vegetarian
Description
Peppermint Meltaway Cookies are irresistibly soft, buttery, and sweet holiday treats with a unique texture that melts in your mouth. Combining the lightness of a cakey cookie and the tenderness of shortbread, these cookies are flavored with peppermint extract and topped with a creamy peppermint buttercream and crushed candy canes for a festive finish.
Ingredients
Cookie Dough
- 1 cup (16 Tbsp; 226g) unsalted butter, softened to room temperature
- ⅔ cup (80g) confectioners’ sugar
- 1 egg yolk, at room temperature
- 1 teaspoon pure vanilla extract
- ½ teaspoon peppermint extract
- 2 cups (250g) all-purpose flour (spooned & leveled)
- ¼ cup (30g) cornstarch
- 1 teaspoon baking powder
- ¼ teaspoon salt
Frosting
- 6 Tablespoons (85g) unsalted butter, softened
- 1 and ½ cups (180g) confectioners’ sugar
- 1–2 Tablespoons milk, at room temperature (dairy or nondairy)
- ½ teaspoon pure vanilla extract
- ¼ teaspoon peppermint extract
- 1 drop red or pink food coloring (optional)
- ¼ cup (40g) crushed candy canes (about 2–3 large candy canes)
Instructions
- Cream Butter and Sugar: In a large bowl using a handheld or stand mixer fitted with a paddle attachment, beat the butter on medium speed until creamy, about 1 minute. Add the confectioners’ sugar and beat on low speed for 30 seconds, then increase to medium-high speed and beat for 2 full minutes, until light and fluffy. Scrape down the sides and bottom of the bowl as needed.
- Add Egg and Extracts: Add the egg yolk, vanilla extract, and peppermint extract and beat on high speed until combined. Scrape down the sides and bottom of the bowl as needed.
- Incorporate Dry Ingredients: Add the flour, cornstarch, baking powder, and salt. Beat on low speed until combined. The cookie dough will be thick and creamy.
- Chill Dough: Cover dough tightly and chill in the refrigerator for at least 30 minutes and up to 3 days. Chilling is mandatory for this creamy cookie dough.
- Preheat Oven and Prepare Pan: Preheat oven to 350°F (177°C). Line large baking sheets with parchment paper or silicone baking mats. Set aside.
- Shape Cookies: Scoop and roll dough into balls, about 1 Tablespoon or 20–22g each. Place dough balls 3 inches apart on the baking sheets, and then flatten each slightly with the palm of your hand to just under 2 inches in diameter.
- Bake: Bake the cookies for 14 minutes or until the edges appear set. Be careful not to over-bake since the cookies won’t brown.
- Cool Cookies: Remove from the oven and allow cookies to cool on the baking sheet for 10 minutes, then transfer to a cooling rack to cool completely before frosting.
- Make Frosting: With a handheld or stand mixer fitted with a paddle attachment, beat the butter on medium speed until creamy, about 1 minute. Add the confectioners’ sugar, milk, vanilla extract, and peppermint extract. Beat on low speed for 30 seconds, then increase to medium-high speed and beat for 2 full minutes. Adjust thickness with more confectioners’ sugar or milk as needed. Add a pinch of salt to balance sweetness.
- Add Color (Optional): If desired, beat in 1 tiny drop of red or pink food coloring, adding more to deepen color.
- Frost and Garnish: Using a knife or icing spatula, spread frosting onto the cooled cookies. Lightly sprinkle each with crushed candy canes.
- Store: Cover and store frosted cookies at room temperature for up to 1 day, or in the refrigerator for up to 5 days. Frosting will slightly dry on top after a few hours.
Notes
- Do not skip chilling the dough for at least 30 minutes to ensure proper texture and easier handling.
- Slightly flatten dough balls before baking to allow even baking and desired cookie shape.
- Cornstarch and confectioners’ sugar are essential for the meltaway texture.
- Use crushed candy canes for garnish to add festive flavor and crunchy texture.
- Adjust frosting consistency by adding more sugar to thicken or milk to thin according to preference.
- Store frosted cookies in the refrigerator if keeping longer than a day to preserve freshness.
Nutrition
- Serving Size: 1 cookie
- Calories: 150 kcal
- Sugar: 12 g
- Sodium: 55 mg
- Fat: 9 g
- Saturated Fat: 5 g
- Unsaturated Fat: 3 g
- Trans Fat: 0 g
- Carbohydrates: 18 g
- Fiber: 0.3 g
- Protein: 1 g
- Cholesterol: 25 mg


Leave a Reply